Installation
Update
If you’re updating from a version prior to Elexis 3.4 or Ungrad 2018, please read the update notes first.
Install precompiled files
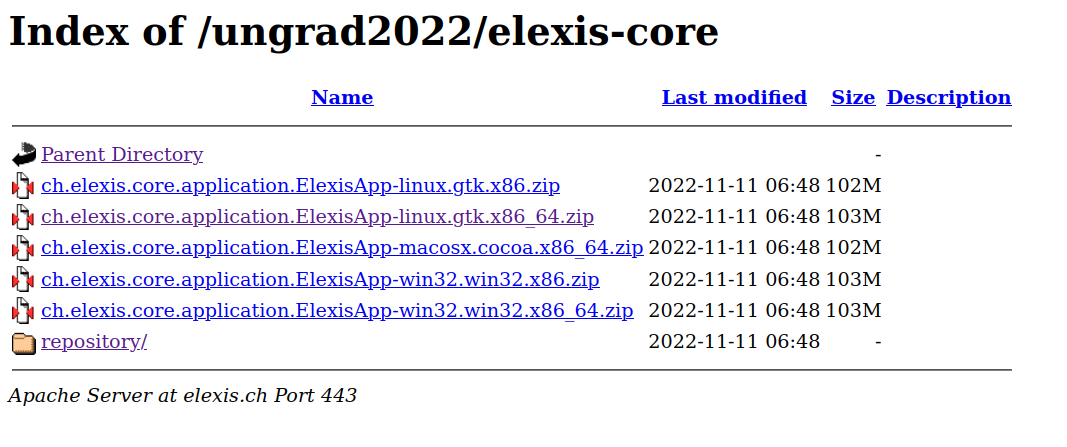
Go to the Elexis-Ungrad website https://elexis.ch/ungrad2023/elexis-core/ and select the package matching your system.
Warning
On Windows, if you like to use embedded OpenOffice/LibreOffice for text editing, you should always chose the 32-Bit-Variant (and also the 32 Bit Java runtime)
Unpack the downloaded files and go on as shown here.
Do it yourself
Note
This guide should work in macOS and Linux. For Windows, some minor modifications might be required.
If you want to compile Elexis Ungrad 2018, you’ll need:
- git
- Java JDK 8 (tested with OpenJDK and Oracle JDK, others wight work as well)
- Maven > version 3.3.0
- The “ungrad2018” branch of the elexis-repositories
Then, create Elexis Ungrad like this:
After this, you should find the Elexis core (i.e. the same thing you could download from the Elexis-Ungrad-Site as mentioned above) in the directory elexis-3-core/ch.elexis.core.p2site/target/products.
Then, build the Elexis Base Features, since Elexis does not make much without these.
The build creates a P2-Site in elexis-3-base/ch.elexis.base.p2site/target/repository.
And last but not least you might want to build the Ungrad specific features:
Again, this creates a P2 update site which is located at elexis-ungrad/ungrad-p2size/target/repository.
After building the products, unpack the Elexis Core matching your system and continue as shown here. Use the P2 repositories created above as local software sites when installing additional fetaures from within the running elexis.
Troubleshooting
If maven just doesn’t want to compile and throws dozens of error messages at your face, it helps sometimes to delete the local maven repository: rm -rf ~/.m2/repository. After that, the first build will take much longer, but sometimes, all errors are magically gone.
Do even more yourself
If you’d like to not only compile Elexis, but also contribute approvement or correct errors, you need to import the sources into your IDE. Since Elexis is an Eclipse RCP application, Eclipse is the recommended IDE.
-
Download Eclipse for RCP and RAP developers. Beginning with the ‘Neon’ BVersion, this is an installer, which allows to select the desired options after its first launch. You’ll need “RCP and RAP”.
-
Start with a brand-new empty workspace (If your workspace is not empty: File -> Switch Workspace)
-
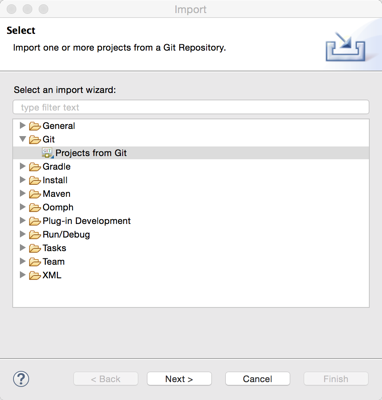
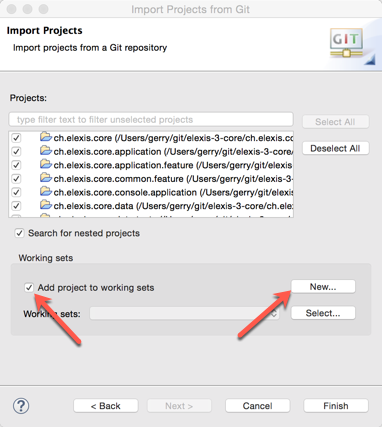
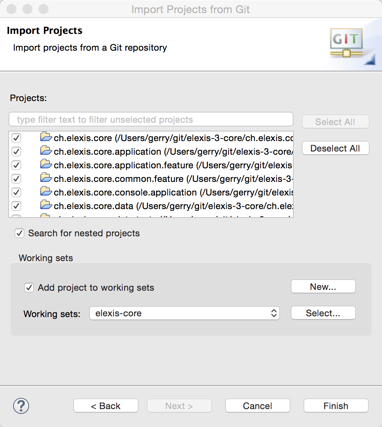
Right click in package explorer, then import-> git -> projects from git.
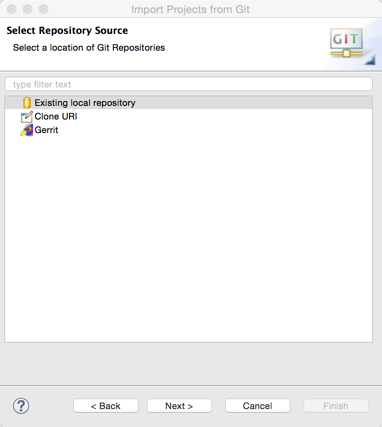
- next, existing local repository, next
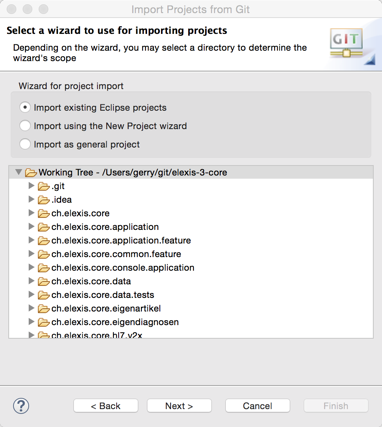
- Add the elexis-3-core repository you cloned above in “Do it yourself”.

- Click Finish, Next, Import existing eclipse peojects, Next.
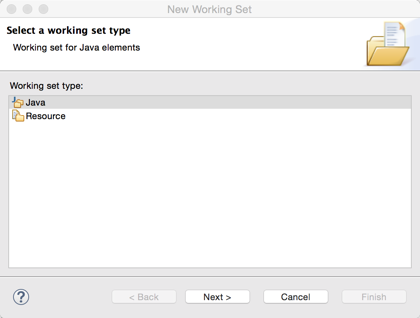
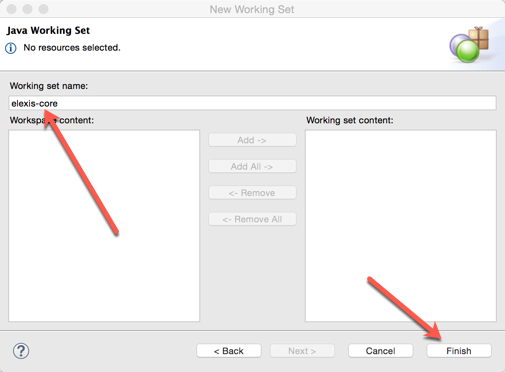
- At this point, I recommend to select “add projects to working set” and to create a working set “elexis core” for all subprojects oif this repository. This helps later finding your way between the hundreds of plug-ins and features of the full Elexis sourcecode.
-
Then, click “Finish” amd let Eclipse compile the workspace. This will take quite some time and display lots of error messages. Don’t panic, read on.
-
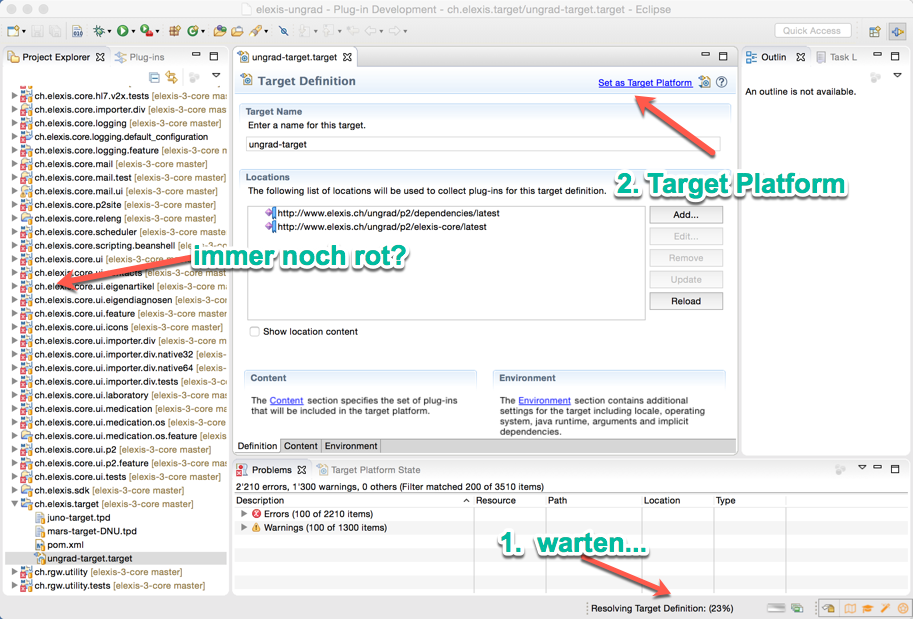
Find the subproject
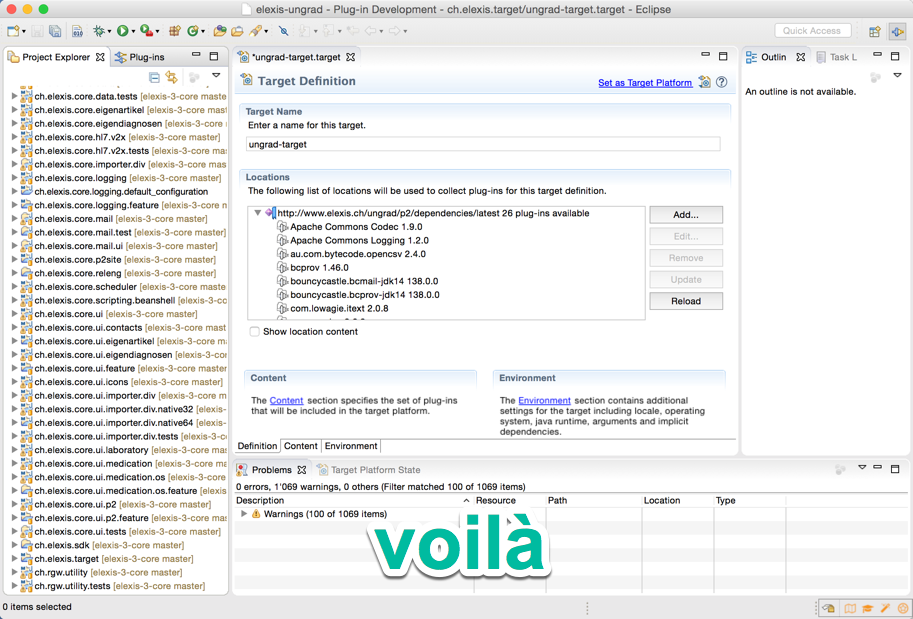
ch.elexis.targetand double-click ’elexis-target’. Let Eclipse resolve the depencies (resolve target definition), and after that process has completed (patience please!), click “Set as Target platform*. Again, this will take some time. After its finished, select the menu “project->clean->clean all projects”.
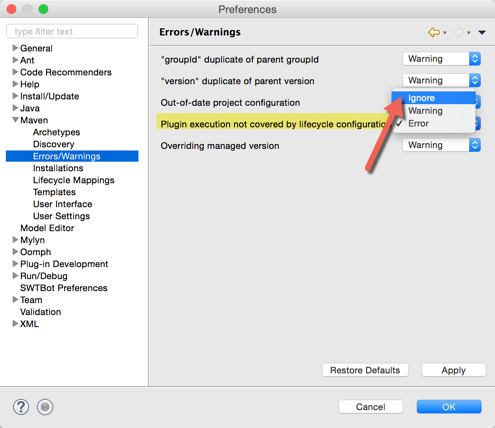
If there are still errors, select the menu “Window->Preferences->Maven->Errors/Warnings” and set the option “Plugin execution not covered by lifecycle configuration” to “Ignore”.
Then, you should be fine.
Importing elexis-3-base and elexis-ungrad is much the same. There shouldn’t be any compile errors anymore. If there are, “clean->clean all projects” should help. Or, in rare cases, a right-click on the concerned plug-in and “Plug-In tools -> Update classpath” resolves the error.
Run configuration
To launch Elexis ungrad from within Eclipse, you need a run configuration.
- Create a new “Eclipse Application”
- In the “main” tab, select “Run a Product” and “ch.elexis.ungrad.branding.product”.
- In the plug-ins tab select “Launch with: Plugins selected below only”. Then click “deselct all” and begin with only one Plug-In: “ch.elexis.ungrad.branding”.
- Click the button “Add required plug-ins”
- Important Deselect ch.elexis.core.console.application consequently.
- Click “Run” and Elexis should start.